
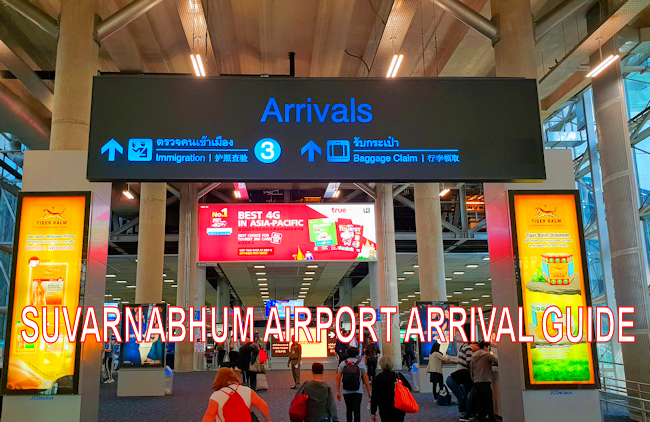

What to Expect After Landing at Bangkok’s Main Airport, Step by Step
Landing at Bangkok’s Suvarnabhumi Airport for the first time can feel intimidating. The airport is huge, the walk from your gate can be long, immigration lines can move fast or painfully slow depending on when several flights land at once, and if you do not know the layout it is easy to waste time, or head in the wrong direction.
The good news is that Suvarnabhumi is much easier to handle once you understand the sequence. In 2026, the arrival flow for most international visitors is straightforward: walk to immigration, clear passport control, collect baggage, pass customs, enter the arrival hall, and then choose the right transport into Bangkok or onward to your hotel. Bangkok’s main airport also now prominently points arriving passengers toward taxis, Grab, limousines, buses, and the Airport Rail Link.
This guide is written for first-time travelers arriving at Suvarnabhumi Airport (BKK) and focuses on what actually matters after landing: the current 2026 arrival process, the new Thailand Digital Arrival Card requirement, where to get cash and SIM service, how to avoid the most common mistakes, and the easiest ways to leave the airport without getting ripped off or overwhelmed.
Quick Answer: What Happens After You Land at Suvarnabhumi?
If you are arriving on an international flight at Suvarnabhumi Airport in 2026, the usual process is:
- Get off the plane and follow the signs to Immigration / Passport Control
- Have your passport and Thailand Digital Arrival Card (TDAC) ready
- Clear immigration
- Collect checked baggage
- Pass customs
- Exit into the arrivals area
- Decide whether you need cash, a SIM/eSIM, food, or transport first
- Go to Level 1 for taxis/Grab/limousine or Level B for the Airport Rail Link
For international passengers, the official airport arrival procedure is still built around those same core steps: passport control, baggage claim, customs, and transportation. The airport’s official arrival guide also notes that international baggage claim belts are in the 5–23 range and that onward transport options include taxi, Grab, limousine, bus, and Airport Rail Link.
Before You Fly: The One 2026 Requirement You Should Not Ignore
Thailand Digital Arrival Card (TDAC)
In 2026, foreign travelers arriving in Thailand are expected to complete the Thailand Digital Arrival Card (TDAC) before arrival. Suvarnabhumi Airport’s own airport guide points arriving passengers to TDAC information, and the form is handled through the official Immigration portal.
What You Need to Know
- Use only the official TDAC website: tdac.immigration.go.th
- Do not pay for it — TDAC is free on the official site. Multiple scam and “agent” websites have been charging travelers for a form that should cost nothing.
- Fill it out before you fly (up to 72 hours prior), not while standing in the arrivals hall.
- Screenshot or save the confirmation so you can show it even if your mobile signal is poor on arrival.
My Recommendation
For a first trip to Thailand, do the TDAC up to 72 hours before departure before arrival, then save:
- 1. The confirmation email
- 2. A screenshot of the QR/confirmation page
- 3. A PDF or offline copy if possible
If you forget, you may still be able to sort it out on arrival, but that is the last thing you want after a long-haul flight.
Step 1: Getting Off the Plane and Walking to Immigration
Follow the Overhead Signs Directing You to Immigration
As soon as you leave the aircraft, start following signs for:
- Immigration
- Passport Control
- Sometimes Visa on Arrival if that applies to your nationality/entry method
At Suvarnabhumi, this part is generally well signposted in Thai and English, and many signs also include Chinese. Depending on where your aircraft parks, the walk can be short or surprisingly long. If your flight arrives at a distant gate or satellite area, expect a longer walk before you even reach the immigration hall.
If you have not cleared immigration yet, keep following Immigration / Passport Control signs.
Do not get distracted by shops, money exchange, or transport planning until you have officially entered Thailand. Your first job is to reach immigration with your documents ready.
Step 2: Immigration and Passport Control
Have these ready before you join the line
Before you enter the immigration queue, get the following out:
- Passport
- Boarding pass or flight details if needed
- TDAC confirmation / QR / screenshot
- Visa or supporting documents if your visa type requires them
- Thailand accommodation address in case you are asked
Expect Different Lanes
At immigration you may see separate lanes or signs for:
- Thai passports
- Foreign passports
- Priority / fast track
- Crew / diplomatic / special categories
The official airport arrival guide notes that certain travelers may use priority lanes, but most first-time tourists should simply join the regular foreign passport line unless they clearly qualify for something else.
How Long Does Immigration Take?
There is no honest “one-size-fits-all” answer.
It can be:
- Fairly quick when the hall is quiet
- Extremely slow (1 to 2 hours) when several large international flights arrive close together.
Your wait depends on:
- Arrival time
- How many flights land around the same time
First-timer Tip
If you know you are a slow bag organizer, use the walk from the gate to immigration to get ready. Have your passport and TDAC pulled up before you reach the queue. The people who hold up their own line are usually the ones digging through bags at the desk.
Step 3: Baggage Claim
Where to go After Immigration
Once your passport is stamped and you have been admitted, follow the signs to Baggage Claim.
Suvarnabhumi’s official arrival guide states that international baggage claim belts are numbered 5–23. If you are unsure which belt is yours, check:
- The large overhead baggage screens
- Your flight number on the monitor
- Staff guidance near the claim area
If Your Bag Does Not Show Up
Do not leave customs if your checked bag is missing and you need to file a report. Look for your airline’s or ground handler’s baggage service desk in the baggage claim area first. The official airport arrival guide lists baggage service locations near the reclaim zones.
Practical Advice
Before you walk away from the belt:
- Check the luggage tag on the bag is actually yours
- Make sure nothing obvious is damaged
- Repack loose items before exiting the secure area if needed
Step 4: Customs
Green Channel vs Red Channel
After baggage claim, you will head toward customs.
The official arrival process still distinguishes between:
- Green channel = nothing to declare
- Red channel = goods to declare
For most tourists with normal personal belongings, this is uneventful. But if you are carrying restricted items, unusually large amounts of cash, or goods that need to be declared, do not guess — follow the red channel rules.
Step 5: You Have Officially Arrived — What Should You Do First?
Once you exit customs, you are in the public arrivals hall area and now you need to decide what comes first:
Money at Suvarnabhumi: ATM or Exchange?
The short version
If you only need enough cash for the first few hours, do not overcomplicate this.
Best approach for most first-time travelers:
- Withdraw or exchange a modest amount only
- Keep the airport task simple
- Move on to your hotel or Bangkok base
- Sort out larger money needs later in the city
If you need cash immediately
You have two main choices:
- ATM withdrawal
- currency exchange counter
Suvarnabhumi’s official airport service pages list bank / ATM / exchange services among the airport facilities.
My recommendation
If you just need transport / snacks / a small buffer:
Get enough for:
- taxi or train
- water / food
- any immediate SIM top-up or small purchase
That usually means small practical cash, not a full trip bankroll.
A common traveler tip about exchange rates
Frequent Thailand travelers often recommend being cautious about poor exchange rates at some airport counters, and many specifically point to the Airport Rail Link basement area as a better place to compare rates than the most obvious arrivals-level counters. That is a traveler tip rather than an airport rule, but it comes up repeatedly in current discussions.
My advice for first-timers
- If you are taking a taxi straight to your hotel, just get enough cash to make life easy.
- If you are taking the Airport Rail Link, you can head toward Level B and deal with exchange there if needed.
- If your card works internationally and the fee is acceptable to you, an ATM can be the least stressful option.
SIM Cards, eSIMs, and Airport Wi-Fi
Should You Buy a SIM at the Airport?
For many first-time travelers, yes — especially if you do not already have an eSIM set up.
Why it helps:
- You can book Grab or contact your hotel immediately
- You can use Google Maps, LINE, WhatsApp, or translation apps right away
- You avoid the stress of arriving in a new country offline
Current Airport/Official SIM Options
The airport and operator sources show tourist SIM availability from True, AIS, and DTAC. (Big 3).
- Data amount
- Validity period
- Whether it is a tourist package only
- Whether it includes calls or just data
Free Wi-Fi
Suvarnabhumi offers airport Wi-Fi, and the airport’s facility pages and traveler reports confirm that connectivity options exist throughout the terminal. Still, for a first-time traveler trying to book transport, message a hotel, or navigate Bangkok, mobile data is more reliable than depending on airport Wi-Fi alone.
My Recommendation
Best setup for first-time travelers:
- Best option: arrive with an eSIM already installed
- Second-best option: buy a tourist SIM at the airport
- Fallback option: use airport Wi-Fi long enough to contact your hotel or book transport
How to Leave Suvarnabhumi Airport: Best Transport Options for First-Time Travelers
This is where many first-time travelers make their first bad Thailand decision.
The airport officially lists a wide range of transport options including:
- Taxi
- Grab
- AOT Limousine
- Airport Rail Link
- Bus
- rental cars
- airport shuttle services
The right one depends on where you are staying, how much luggage you have, what time you land, and how tired you are.
Option 1: Official Taxi From Suvarnabhumi
Best for:
- First-time travelers with luggage
- Families
- Late-night arrivals
- Anyone staying somewhere awkward for rail connections
- Anyone who just wants the simplest door-to-door option
Where to Get Transportation
Suvarnabhumi’s official transportation page states that taxis are available 24 hours a day at the passenger terminal on Level 1, between Gates 4 and 7 on the inner curb, and that passengers should take a queue ticket.
What to Expect
There are different taxi categories, including:
- Regular taxis
- Short-distance taxis
- Larger taxi /van options
What First-Time Travelers Should Know
A normal airport taxi into Bangkok typically means:
- Meter fare
- Airport surcharge
- Possible tolls
- total cost varying by destination and traffic
Important Rule
Use the official taxi queue only.
Do not follow random touts inside the terminal offering “taxi taxi” or “special price.” If you want a taxi, go to the official queue system.
Taxi Pros
- Easiest if you are tired
- Hotel drop-off is simple
- Good if arriving after dark or in heavy rain
- Ideal with multiple bags
Taxi Cons
- More expensive than rail
- Bangkok traffic can be brutal and depending on traffic and weather, the meter will continue to run.
- If you are staying near an Airport Rail Link or BTS/MRT connection, rail may be faster (although not ideal with more than 1 bag).
Option 2: Grab From Suvarnabhumi
Best for:
- Travelers who already have data and the app set up
- People who prefer app-based pricing / tracking
- Travelers comfortable using pickup instructions
Suvarnabhumi’s official transport page explicitly includes Grab among airport transport options.
My Advice for First-Timers
Grab can be a good option, but it is easiest when:
- Your phone is already connected
- You understand where the pickup point is
- You are not completely exhausted and overwhelmed
If you are landing after a 12-hour flight with two suitcases and zero patience, the official taxi queue may feel easier.
Option 3: Airport Rail Link (ARL)
Best for:
- Budget-conscious travelers
- Solo travelers with manageable luggage
- Anyone staying near a BTS/MRT connection
- People heading toward central Bangkok without wanting to sit in traffic
The Airport Rail Link is one of the best-value ways to leave Suvarnabhumi. The airport and Bangkok transport guides consistently point travelers to the Airport Rail Link on Level B, with service into the city and onward connections from there.
Why Many Travelers Love It
- Avoids road traffic
- Relatively cheap
- Simple once you find it
- Especially useful if your hotel is near Phaya Thai, Makkasan, or a convenient BTS/MRT connection
Who Should Not Choose It
I would skip the Airport Rail Link on your first arrival if:
- You have a lot of heavy luggage
- Your hotel is nowhere near a station
- You land very late and feel wiped out
- You are traveling with young children and want the least complicated route possible
Option 4: AOT Limousine or Pre-Booked Transfer
Best for:
- Travelers who want zero hassle
- Families or older travelers
- Business travelers
- Anyone arriving very late and wanting a fully organized transfer
The airport lists AOT Limousine among its official transport options.
This is not the cheapest option, but it can be the most comfortable and predictable if you simply want someone waiting and a clean, straightforward transfer to your hotel.
Which Transport Option Should You Choose?
If you are staying in Sukhumvit, Siam, Silom, or near a BTS/MRT line
Best choices:
- Airport Rail Link if you are comfortable with light luggage and rail transfers
- Taxi if you want door-to-door simplicity
If you are staying near the airport for the first night
Best choice:
- Taxi
- or a pre-arranged hotel transfer if your hotel offers one
If you land after midnight or you are exhausted
Best choice:
- Official taxi
- or pre-booked transfer
If you are backpacking and want the cheapest reasonable option into central Bangkok
Best choice:
- Airport Rail Link
Should You Stay Near Suvarnabhumi for the First Night?
For many first-time travelers, the answer is yes — sometimes.
Staying Near the Airport Makes Sense If:
- You land very late
- You have children
- You have a domestic connection the next morning
- You are nervous about arriving in Bangkok at night
- You just want a low-stress first night before moving into the city
Going Straight into Bangkok Makes More Sense If:
- You land in the afternoon or early evening
- You have a hotel already booked in a good area
- You are comfortable using a taxi or the Airport Rail Link
- You do not want to waste a day changing hotels.
My Recommended Arrival Strategy for First-Time Travelers
If I were advising a first-time traveler arriving at Suvarnabhumi in 2026, I would keep it very simple:
Best Low-Stress Arrival Plan
Before Departure
- Complete TDAC on the official site
- Install an eSIM or decide exactly where you’ll get a SIM
- Save hotel address and booking confirmation offline
After Landing
- Go straight to immigration
- Collect luggage
- Pass customs
- Enter the arrival hall
- Mae your way to the bottom floor to exchange currency at SuperRich
- Take an official taxi if you are tired, late, or carrying a lot
- Take the Airport Rail Link if you are staying near a good rail connection and traveling light
That is the version of arrival that gives first-time travelers the fewest moving parts and the lowest chance of getting rattled.
Suvarnabhumi Airport Arrival Checklist for First-Time Travelers
Before You Fly
- Passport valid and accessible
- TDAC completed on the official site
- Hotel address saved offline
- Phone charger / power bank accessible
- eSIM installed or plan for airport SIM
- Cash or working bank card (The law states travelers much have at least 20,000 thb when entering Thailand)
After Landing
- Clear Immigration
- Retrieve Baggage
- Pass Customs
- Enter arrival hall
- Go to the first floor to exchange currency at SuperRich
- Make your way to the official taxi queue
Official Suvarnabhumi Airport Resources
Airport arrival procedure
Suvarnabhumi Arrival Procedure (official)
Airport transportation options
Suvarnabhumi Transportation Guide (official)
Airport facilities, ATM, exchange, services
Suvarnabhumi Airport Facilities (official)
Thailand Digital Arrival Card information from the airport
Suvarnabhumi TDAC Information Page
Official Thailand Digital Arrival Card portal
Thailand Digital Arrival Card Official Portal
Final Thoughts
Suvarnabhumi Airport can look overwhelming on a first visit, but the actual arrival process is not complicated once you break it into parts. The key is to avoid turning your arrival into a dozen decisions at once. Handle immigration first, get your bag, clear customs, get connected, and then choose the simplest transport option for your energy level and hotel location.
If you are arriving in Thailand for the first time, the two biggest things that make the experience easier in 2026 are doing the TDAC properly before you fly and already knowing whether you are taking a taxi or the Airport Rail Link before you leave customs.
Do those two things, and your first hour in Thailand will be dramatically easier.